Tuesday, July 31, 2012

Google Map Tutorial Android (Advance)


Hello Android Guys...hope you doing great!!

We know already how to get Google map in our Android App see my earlier tutorial post
Google Map Tutorial Android (Basic)

Note: Because we need to Get Google map API key to Get map in our app
 I have wrote step by step simple tutorial see and put in you main.xml file see below


Okay so today we are going to add some more new things to our Google Maps

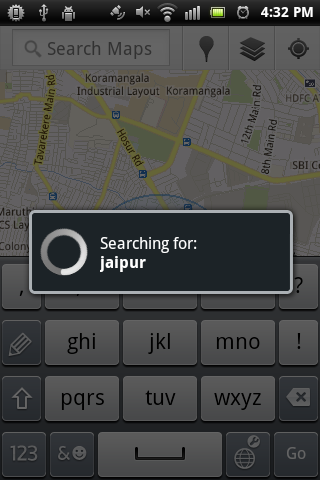
1. Enter location name and Go to particular location
2. Bookmark location (POI) place of interest on map
3. Get the location name/coordinates where you touched on map
4. Zoom-in and Zoom-out map location

Let's start coding stuff..create an Android app with


 -------------------------------------------
App Name: GoogleMapAdvance
Package Name: com.rdc
Android SDK: Android SDK 2.3.3 /  Google API 10
Default MapActivity Name: ActivityGoogleMap
-------------------------------------------

ActivityGoogleMap

package com.rdc.gmap;

import java.io.IOException;
import java.util.List;
import java.util.Locale;

import android.content.Intent;
import android.graphics.Bitmap;
import android.graphics.BitmapFactory;
import android.graphics.Canvas;
import android.graphics.Point;
import android.location.Address;
import android.location.Geocoder;
import android.net.Uri;
import android.os.Bundle;
import android.view.MotionEvent;
import android.view.View;
import android.view.View.OnClickListener;
import android.widget.Button;
import android.widget.EditText;
import android.widget.Toast;

import com.google.android.maps.GeoPoint;
import com.google.android.maps.MapActivity;
import com.google.android.maps.MapController;
import com.google.android.maps.MapView;
import com.google.android.maps.Overlay;

public class ActivityGoogleMap extends MapActivity 
implements OnClickListener {
 private MapView mapView = null;
 private Button btnGo = null;
 private EditText editLocation = null;
 private MapController mController = null;
 private GeoPoint gPoint = null;

 @Override
 public void onCreate(Bundle savedInstanceState) {
  super.onCreate(savedInstanceState);
  setContentView(R.layout.main);

  // to add zoom in and zoom out default buttons
  mapView = (MapView) findViewById(R.id.mapView);
  mapView.setBuiltInZoomControls(true);

  btnGo = (Button) findViewById(R.id.buttonGo);
  btnGo.setOnClickListener(this);

  editLocation = (EditText) findViewById(R.id.editText1);

  // load bangalore as default location
  browseLocation();

  // ---Add a location marker---
  MapOverlay mapOverlay = new MapOverlay();
  List<Overlay> listOfOverlays = mapView.getOverlays();
  listOfOverlays.clear();
  listOfOverlays.add(mapOverlay);

  mapView.invalidate();
 }

 @Override
 public void onClick(View v) {
  if (btnGo == v) {
   String location = editLocation.getText().toString();
   if (location.equalsIgnoreCase("")) {
   Toast.makeText(getBaseContext(),"Please Enter location!!",
      Toast.LENGTH_SHORT).show();
   } else {

    String map_location = "geo:0,0?q=" + location;
    Uri geoUri = Uri.parse(map_location);
    Intent mapCall = new Intent(Intent.ACTION_VIEW, geoUri);
    startActivity(mapCall);

    // clear old location string
    location = null;
   }

  }

 }

 @Override
 protected boolean isRouteDisplayed() {
  // TODO Auto-generated method stub
  return false;
 }

 // to load particular location on g-map
 public void browseLocation() {
  mController = mapView.getController();
  String coordinates[] = { "12.917233", "77.620811" };
  double lat = Double.parseDouble(coordinates[0]);
  double lng = Double.parseDouble(coordinates[1]);

  gPoint = new GeoPoint((int) (lat * 1E6), (int) (lng * 1E6));

  mController.animateTo(gPoint);
  mController.setZoom(17);
 }

 // create inner class to add marker at any place on g-map
 class MapOverlay extends com.google.android.maps.Overlay {

  // add bookmark on map
  @Override
  public boolean draw(Canvas canvas, MapView mapView, 
    boolean shadow, long when) {
   super.draw(canvas, mapView, shadow);

   // ---translate the GeoPoint to screen pixels---
   Point screenPts = new Point();
   mapView.getProjection().toPixels(gPoint, screenPts);

   // ---add the marker---
   Bitmap bmp = BitmapFactory.decodeResource(getResources(),
     R.drawable.red_pushpin2);
   canvas.drawBitmap(bmp, screenPts.x, screenPts.y - 50, null);
   return true;
  }

  // get the location where you touched on map
  @Override
  public boolean onTouchEvent(MotionEvent event, MapView mapView) {
   // ---when user lifts his finger---
   if (event.getAction() == 1) {
    GeoPoint p = mapView.getProjection().fromPixels(
      (int) event.getX(), (int) event.getY());

    Geocoder geoCoder = new Geocoder(getBaseContext(),
      Locale.getDefault());
    try {
     List<Address> addresses = geoCoder.getFromLocation(
      p.getLatitudeE6()/ 1E6, p.getLongitudeE6()/ 1E6,
        1);

     String add = "";
     if (addresses.size() > 0) {
      for (int i = 0; i < addresses.get(0)
        .getMaxAddressLineIndex(); i++)
      add += addresses.get(0).getAddressLine(i) + "\n";
     }

     Toast.makeText(getBaseContext(), add, 
      Toast.LENGTH_SHORT).show();
    } catch (IOException e) {
     e.printStackTrace();
    }
    return true;
   } else
    return false;
  }

 }

}
main.xml

Note: make sure you must have Google Map API key to put in Map View in main.xml file
(This is the mistake often made by newbie)

<?xml version="1.0" encoding="utf-8"?>
<LinearLayout
 xmlns:android="http://schemas.android.com/apk/res/android"
 android:orientation="vertical"
 android:weightSum="1"
 android:layout_height="fill_parent"
 android:layout_width="fill_parent">
 <LinearLayout
  android:gravity="center"
  android:layout_height="wrap_content"
  android:layout_width="match_parent"
  android:id="@+id/linearLayout1"
  android:layout_weight="0.02"
  android:weightSum="1">
  <Button
   android:layout_width="wrap_content"
   android:layout_height="wrap_content"
   android:layout_marginLeft="2dp"
   android:layout_weight=".10"
   android:id="@+id/buttonGo"
   android:text=" Go "></Button>
  <EditText
   android:layout_height="wrap_content"
   android:id="@+id/editText1"
   android:lines="1"
   android:singleLine="true"
   android:layout_width="wrap_content"
   android:layout_marginRight="2dp"
   android:layout_weight=".90"></EditText>
 </LinearLayout>
 <LinearLayout
  android:id="@+id/laymap"
  android:layout_width="fill_parent"
  android:orientation="vertical"
  android:layout_height="wrap_content"
  android:layout_weight="0.98">
  <com.google.android.maps.MapView
   android:id="@+id/mapView"
   android:layout_width="fill_parent"
   android:layout_height="fill_parent"
   android:enabled="true"
   android:clickable="true"
   
   android:apiKey="0iuCzAK4N1AoTya_fr62sB7NXXPqkWqF-OCNMEg" />
 </LinearLayout>
<!-- you need to replace your Google map API key here see apiKey="" -->
</LinearLayout>


and Manifest file is

<?xml version="1.0" encoding="utf-8"?>
<manifest
 xmlns:android="http://schemas.android.com/apk/res/android"
 package="com.rdc.gmap"
 android:versionCode="1"
 android:versionName="1.0">
 <uses-sdk android:minSdkVersion="10" />

 <uses-permission android:name="android.permission.INTERNET" />
 <application
  android:icon="@drawable/icon"
  android:label="@string/app_name">

  <uses-library android:name="com.google.android.maps" />
  <activity
   android:name=".ActivityGoogleMap"
   android:theme="@android:style/Theme.NoTitleBar"
   android:label="@string/app_name">
   <intent-filter>
   <action android:name="android.intent.action.MAIN" />
   <category android:name="android.intent.category.LAUNCHER" />
   </intent-filter>
  </activity>

 </application>
</manifest>


Default Output screen will load as Bangalore and Mark it


 if you touch any place on map it shows details like this

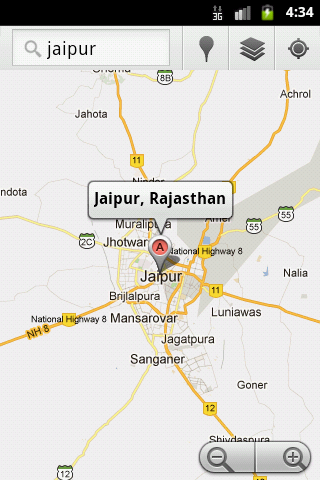
 when you enter any location and click Go...it loads new location...


You can download the complete source code zip file here : GoogleMapAdvance

 cheers!!

 I'd love to hear your thoughts!

Monday, July 30, 2012

Google Map Tutorial Android (Basic)


In this tutorial we will learn how can we add google map into our android app in a very easy & simple way.

Note:  Because the Maps library is not a part of the standard Android library, you must  remember four things at-least to get G-Map in our app .

1. Obtaining a Google Maps Android API Key to get G-Map view in our app.
2.Select Android SDK with Google APIs (when create new app)
3. We need to extends MapActivity
4. Your emulator also created with Google API SDK to run Google map apps (before run app).

so let's try this small app

First is first: Obtain Google Maps Android API
***************************************************************************
1. Create a folder in C drive called "C:\Android"

2. Go to this path "C:\Program Files\Java\<JDK_version_number>\bin"
or where you installed java, copy "keytool.exe" file and put in our created folder " Android ".

3. Now we need to look for "debug.keystore" for probably you can find here

  •     Windows Vista: C:\Users\\.android\debug.keystore
  •     Windows XP: C:\Documents and Settings\\.android\debug.keystore
  •     OS X and Linux: ~/.android/debug.keystore 

In my system i got here "C:\Users\RDC\.android\debug.keystore"

Now copy this file and put into our folder " Android "

4. open command prompt and go to bin folder in prompt.
 then hit command
--------------------------------------------------------------------------------------------------------
keytool.exe -list -alias androiddebugkey -keystore "C:\android\debug.keystore" -storepass android -keypass android
--------------------------------------------------------------------------------------------------------
Now we need to copy MD5 key so right click on command prompt and "mark" then copy and save in Text file. see below image...


Copy MD5 key and open this developer-page and sign in.
then paste here MD5 fingerprint and Generate API key this way


after generating key the result screen will be


you can use this key whenever wants to develop Google map app in this development environment only.

Okay Great!! now we are ready to go...make sure don't use mine key its valid only for my development environment so use your own key :D

*****************************************************************************


Let's create new android app this way..

 -------------------------------------------
App Name: AlertBoxBasic
Package Name: com.rdc
Android SDK: Android SDK 2.3.3 / API 10
Default MapActivity Name: ActivityGoogleMap
-------------------------------------------

ActivityGoogleMap.java
package com.rdc.gmap;

import android.os.Bundle;
import com.google.android.maps.MapActivity;
import com.google.android.maps.MapView;

public class ActivityGoogleMap extends MapActivity {
    
    @Override
    public void onCreate(Bundle savedInstanceState) {
        super.onCreate(savedInstanceState);
        setContentView(R.layout.main);
        
        //to add zoom in and zoom out default buttons
        MapView mapView = (MapView) findViewById(R.id.mapView);
        mapView.setBuiltInZoomControls(true);
    }
    
    @Override
 protected boolean isRouteDisplayed() {
  // TODO Auto-generated method stub
  return false;
 }
}

look important Google API key in main.xml
<?xml version="1.0" encoding="utf-8"?>
<LinearLayout
 xmlns:android="http://schemas.android.com/apk/res/android"
 android:orientation="vertical"
 android:layout_width="fill_parent"
 android:layout_height="fill_parent">
 <com.google.android.maps.MapView
  android:id="@+id/mapView"
  android:layout_width="fill_parent"
  android:layout_height="fill_parent"
  android:enabled="true"
  android:clickable="true"
  android:apiKey="0iuCzAK4N1AoTya_fr62sB7NXXPqkWqF-OCNMEg" />

</LinearLayout>


and Manifest file must be like
<?xml version="1.0" encoding="utf-8"?>
<manifest
 xmlns:android="http://schemas.android.com/apk/res/android"
 package="com.rdc.gmap"
 android:versionCode="1"
 android:versionName="1.0">
 <uses-sdk android:minSdkVersion="10" />
 <uses-permission android:name="android.permission.INTERNET" />
 <application
  android:icon="@drawable/icon"
  android:label="@string/app_name">

  <uses-library android:name="com.google.android.maps" />
  <activity
   android:name=".ActivityGoogleMap"
   android:theme="@android:style/Theme.NoTitleBar"
   android:label="@string/app_name">
   <intent-filter>
   <action android:name="android.intent.action.MAIN" />
   <category android:name="android.intent.category.LAUNCHER" />
   </intent-filter>
  </activity>

 </application>
</manifest>

Now create Emulator using Google API SDK see below image

The output Screen will be like this..


You can download the complete source code zip file here : GoogleMapBasic

 cheers!!

 I'd love to hear your thoughts!

Wednesday, July 4, 2012

Android Tricks

How to Disable Home Button
    @Override
    public void onAttachedToWindow()
    {  
        this.getWindow().setType(WindowManager.
          LayoutParams.TYPE_KEYGUARD_DIALOG);     
        super.onAttachedToWindow();  
    }

How to Disable Back Button
    @Override
    public boolean onKeyDown(int keyCode, KeyEvent event) {
        return false;
    }

How to Disable Soft Keypad
final EditText txtName = (EditText) findViewById(R.id.txtName);
txtName.setInputType(InputType.TYPE_NULL);

How to Make Static Rotation/orientation in Android
        //if you want to lock screen for always Portrait mode
        setRequestedOrientation(ActivityInfo.SCREEN_ORIENTATION_PORTRAIT);
                                     or
        //if you want to lock screen for always Landscape mode
        setRequestedOrientation(ActivityInfo.SCREEN_ORIENTATION_LANDSCAPE);


How to Disable screen Rotation/orientation in Android (better way is java code)
        
//put this code in Manifest file, activity tag
android:screenOrientation="nosensor"
android:configChanges="keyboardHidden|orientation|screenSize"
/* or even you can do it by programmatically -- just put 
Configuration code in onResume method before calling super 
like this */
@Override
protected void onResume() {
    int currentOrientation = getResources().getConfiguration()
                               .orientation;
    if (currentOrientation == Configuration.ORIENTATION_LANDSCAPE) 
    {
        setRequestedOrientation(ActivityInfo
                    .SCREEN_ORIENTATION_SENSOR_LANDSCAPE);
    }
    else {
        setRequestedOrientation(ActivityInfo
                    .SCREEN_ORIENTATION_SENSOR_PORTRAIT);
    }
    super.onResume();
}
How to Disable Title Bar and Make Full Screen View
        
//1. put this line to manifest file in Application tag
android:theme="@android:style/Theme.Black.NoTitleBar.Fullscreen"

//2. put below code in your activity onCreate method

//to disable notification bar (Top Bar)
        requestWindowFeature(Window.FEATURE_NO_TITLE);        
                         
        
        //to set full screen view
        getWindow().setFlags(WindowManager.LayoutParams.FLAG_FULLSCREEN,
                     WindowManager.LayoutParams.FLAG_FULLSCREEN);
        
        //make sure code should be before calling below method
        setContentView(R.layout.main);

How to Create Alert Dialog Box in Android
        AlertDialog.Builder builder = new AlertDialog.Builder(this);
        builder.setMessage("App has been started..")
               .setCancelable(false)
               .setTitle("Alert Box")           
               .setNegativeButton("OK", new DialogInterface.OnClickListener() {
                   public void onClick(DialogInterface dialog, int id) {
                        dialog.cancel();
                   }
               });
        AlertDialog alert = builder.create();
        alert.show();


How to Create Toast message in Android
        Toast.makeText(getApplicationContext(), "I am splash message..", 
          Toast.LENGTH_LONG).show();

How to create Progress Dialog in Android
        ProgressDialog dialog = ProgressDialog.show(this, "", 
                "Loading. Please wait...", true);

Load Home Screen Programmatically in Android
  //to load home screen put this code in onClick method of desired button
  Intent startMain = new Intent(Intent.ACTION_MAIN);
  startMain.addCategory(Intent.CATEGORY_HOME);
  startMain.setFlags(Intent.FLAG_ACTIVITY_NEW_TASK);
  startActivity(startMain)

Start/Load Activity from Activity
//put this code where you want to load another Activity
Intent intent = new Intent(FirstActivty.this, SecondActivity.class);

//below 2 lines (Flags) are optional
// 1. if set, it will clear the back stack
intent.setFlags(Intent.FLAG_ACTIVITY_CLEAR_TOP);

// 2. If set, this activity will become the start of a new task
intent.addFlags(Intent.FLAG_ACTIVITY_NEW_TASK);

startActivity(intent);

Make a Phone Call
String mobileNo = "+919741817902";
String uri = "tel:" + mobileNo.trim() ;
Intent intent = new Intent(Intent.ACTION_CALL);
intent.setData(Uri.parse(uri));
startActivity(intent);

//add permission to Manifest file

How to check WiFi is Connected or Not
public void chekcWifiConnectDisconnect() {
  ConnectivityManager connManager = (ConnectivityManager) 
    getSystemService(CONNECTIVITY_SERVICE);
  NetworkInfo mWifi = connManager
    .getNetworkInfo(ConnectivityManager.TYPE_WIFI);

  if (mWifi.isConnected()) {
   Log.v("Debug", "Wifi is connectd..");   
  } else {
   Log.v("Debug", "Wifi is not connectd..");   
  }

}

//dont forget to put Wifi permission in manifest file

Monday, July 2, 2012

Read & Store Log-cat Programmatically in Android

Android provide Logcat option with ADB to Debugg the Application.

So we can test app on Emulator and with the help of Logcat we can easily trace the Error details.

But if We are testing on Real Android Device and that is not connected with system then its hard know where we are getting exception, error etc.

so for that i wrote this Tutorial

We can read the Logcat details programmatically and also at run-time we can store in Text file and later we can see the error details.

so what we will do in this code:

  • Read the logcat
  • Showing the logcat on TextView
  • Create a Text file
  • store logcat into Text file
  • and finally save file into SDCard.

see below code snap..

//to read the logcat programmatically
try {
 Process process = Runtime.getRuntime().exec("logcat -d");
 BufferedReader bufferedReader = new BufferedReader(
 new InputStreamReader(process.getInputStream()));

        StringBuilder log=new StringBuilder();
        String line;
        while ((line = bufferedReader.readLine()) != null) 
       {
         log.append(line);
       }      
} 
catch (IOException e) {
}

//to create a Text file name "logcat.txt" in SDCard
File sdCard = Environment.getExternalStorageDirectory();
File dir = new File (sdCard.getAbsolutePath() + "/myLogcat");
dir.mkdirs();
File file = new File(dir, "logcat.txt");


don't forget to add permission for read log-cat in manifest file


add permission for writing text file to SDCard file


So lets create a small App to do this things

-------------------------------------------
App Name: LogCollect
Package Name: com.rdc
Android SDK: Android SDK 2.3.3 / API 10
Default Activity Name: LogTest
-------------------------------------------

LogTest.java
package com.rdc;

import java.io.BufferedReader;
import java.io.File;
import java.io.FileNotFoundException;
import java.io.FileOutputStream;
import java.io.IOException;
import java.io.InputStreamReader;
import java.io.OutputStreamWriter;

import android.app.Activity;
import android.os.Bundle;
import android.os.Environment;
import android.widget.TextView;

public class LogTest extends Activity {
 
 private StringBuilder log;
 
 @Override
 public void onCreate(Bundle savedInstanceState) {
   super.onCreate(savedInstanceState);
   setContentView(R.layout.main);
   try {
    Process process = Runtime.getRuntime().exec("logcat -d");
    BufferedReader bufferedReader = new BufferedReader(
    new InputStreamReader(process.getInputStream()));
 
    log=new StringBuilder();
    String line;
    while ((line = bufferedReader.readLine()) != null) {
      log.append(line);
    }
    TextView tv = (TextView)findViewById(R.id.textView1);
    tv.setText(log.toString());
  } catch (IOException e) {
  }       

 
 //convert log to string
 final String logString = new String(log.toString());
 
 //create text file in SDCard
 File sdCard = Environment.getExternalStorageDirectory();
 File dir = new File (sdCard.getAbsolutePath() + "/myLogcat");
 dir.mkdirs();
 File file = new File(dir, "logcat.txt");

 try {  
  //to write logcat in text file
  FileOutputStream fOut = new FileOutputStream(file);
  OutputStreamWriter osw = new OutputStreamWriter(fOut); 

        // Write the string to the file
        osw.write(logString);            
        osw.flush();
        osw.close();
 } catch (FileNotFoundException e) {
  e.printStackTrace();
 } catch (IOException e) {
  e.printStackTrace();
 }
  }
}

main.xml


and the manifest file: make sure you need to add permission


you can check the stored file open DDMS in eclipse and go to this path (in my cash)

File Explorer

data/mnt/sdcard/myLogcat/logcat.txt

now you can pull out this "logfile.txt" and store in local system. see below snap shot


also if you execute this app it will show you the log-cat on TextView with Scrolling like this

You can download the complete source code zip file here : LogCollect


cheers!!

I'd love to hear your thoughts!